
Mutton Biryani!
I am from Dindugal. Birth place of the famous Thalapakatti biryani.
So the affinity towards biryani runs in the family. Give me biryani for all the
meals- breakfast, lunch, snack, dinner and mid night snack and I won’t
complain. I will only ask for more 😋 According to my elder one Tharu, when you
say biryani, it has to have piece (chicken or mutton). If it has only peas (or
other veggies), then it simply cannot be called biryani. The only name it can
have, according to her, is pulao . The perfect biryani is made of jeera rice. From
where I come from, basmati rice biryani is just nonexistent. Making biryani out
of jeera rice is a subtle art. But the end product is totally worth it.
The mutton pieces are juicy and succulent.
The flavor is completely absorbed by the pieces. The rice is perfectly cooked
and evenly coated with the masala. Mutton biryani, mutton gravy and raitha and
my dream meal is good to eat. Happy weekend!

Preparation time: 15 minutes| Cooking time: 25 to 30 minutes
Course: Main| Cuisine: South Indian
Ingredients:
Mutton- ½ kg
Jeera samba rice- 2 cups
Onion- 3(large, finely chopped)
Tomato-2 (medium, finely chopped)
Green chilies-3 (slit lengthwise)
Ginger garlic paste- 3 to 4 tblsp
Curd- ¼ cup
Chili powder- 1 to 2 tsp
Turmeric powder- ¼ tsp
Mint leaves- ½ cup
Coriander leaves- ¼ cup
Salt- to taste
To temper:
Oil- 3 to 4 tblsp
Ghee- 2 tblsp
Cinnamon sticks- 3 to 4
Cloves- 6 to 7
Elachi-2
Star anise-1
Bay leaves- 2 to 3
Method:
1.
Soak the jeera samba rice in water for 15 to 20
minutes.
2.
Heat oil and ghee together in a pressure cooker.
Add cinnamon, cloves, star anise, cardamom and bay leaves.
3.
When it splutters add finely chopped onion and
slit green chillies. Saute well. The colour of the biryani depends on the
colour of the onion. So saute the onion accordingly.
4.
Then add ginger garlic paste and stir well. Fry until
raw smell leaves.
5.
Now add chili powder and turmeric powder. Stir for
2 to 3 minutes until raw smell leaves.
6.
Then add curd and give everything a mix. Let it
boil for a minute.
7.
Add the cleaned mutton pieces. Stir well so that
the masala coats well on the mutton pieces.
8.
Then add tomato and salt. Stir everything together.
9.
Add 1 cup water and pressure cook the mutton for
7 to 8 whistles.
10.
Once the pressure releases, remove the excess
water (stock) from the mutton masala and keep it aside for further use
11.
Add the soaked rice (after draining the water used
for soaking).
12.
Saute it gently so that the masala coats on the
rice. Make sure you don’t break the rice.
13.
Now time to add water. Need to add 3 1/2 cups of
water for two cups of rice. This water measurement includes the excess stock
removed from the mutton masala.
14.
After adding water, stir gently and check for
spice and salt. Add accordingly.
15.
Then finally add mint leaves and coriander
leaves. Stir again gently.
16.
Close the cooker and once the steam starts
coming out, put the weight and immediately turn it to very low flame. Cook in
very low flame for 10 minutes exact. Then switch off the flame.
17.
Once the pressure releases, open the lid of the
cooker and leave it for 5 minutes. Then fluff it with a fork without breaking
the rice.
Notes:
·
I have used jeera samba rice for making this
biryani. You can also use basmati rice. But I would suggest you to go for jeera
samba only.
·
Don’t forget to soak the rice, before using it
in the recipe.
·
Rice will be soft after soaking. So while
stirring the rice, do it gently.
·
The same recipe can be used for chicken biryani
also. cooking time for chicken is lesser than mutton. cook only for 3 whistles for chicken.
·
You can increase the quantity of chili powder to
suit your taste.
Step by step pictures

wash and soak rice in water
for 15 to 20 minutes

heat oil and ghee in a pressure cooker

add all the whole spices
given in temper section

when it splutters add onion
and slit green chilies
fry well until the colour
changes to brown

add ginger garlic paste
fry until raw smell leaves
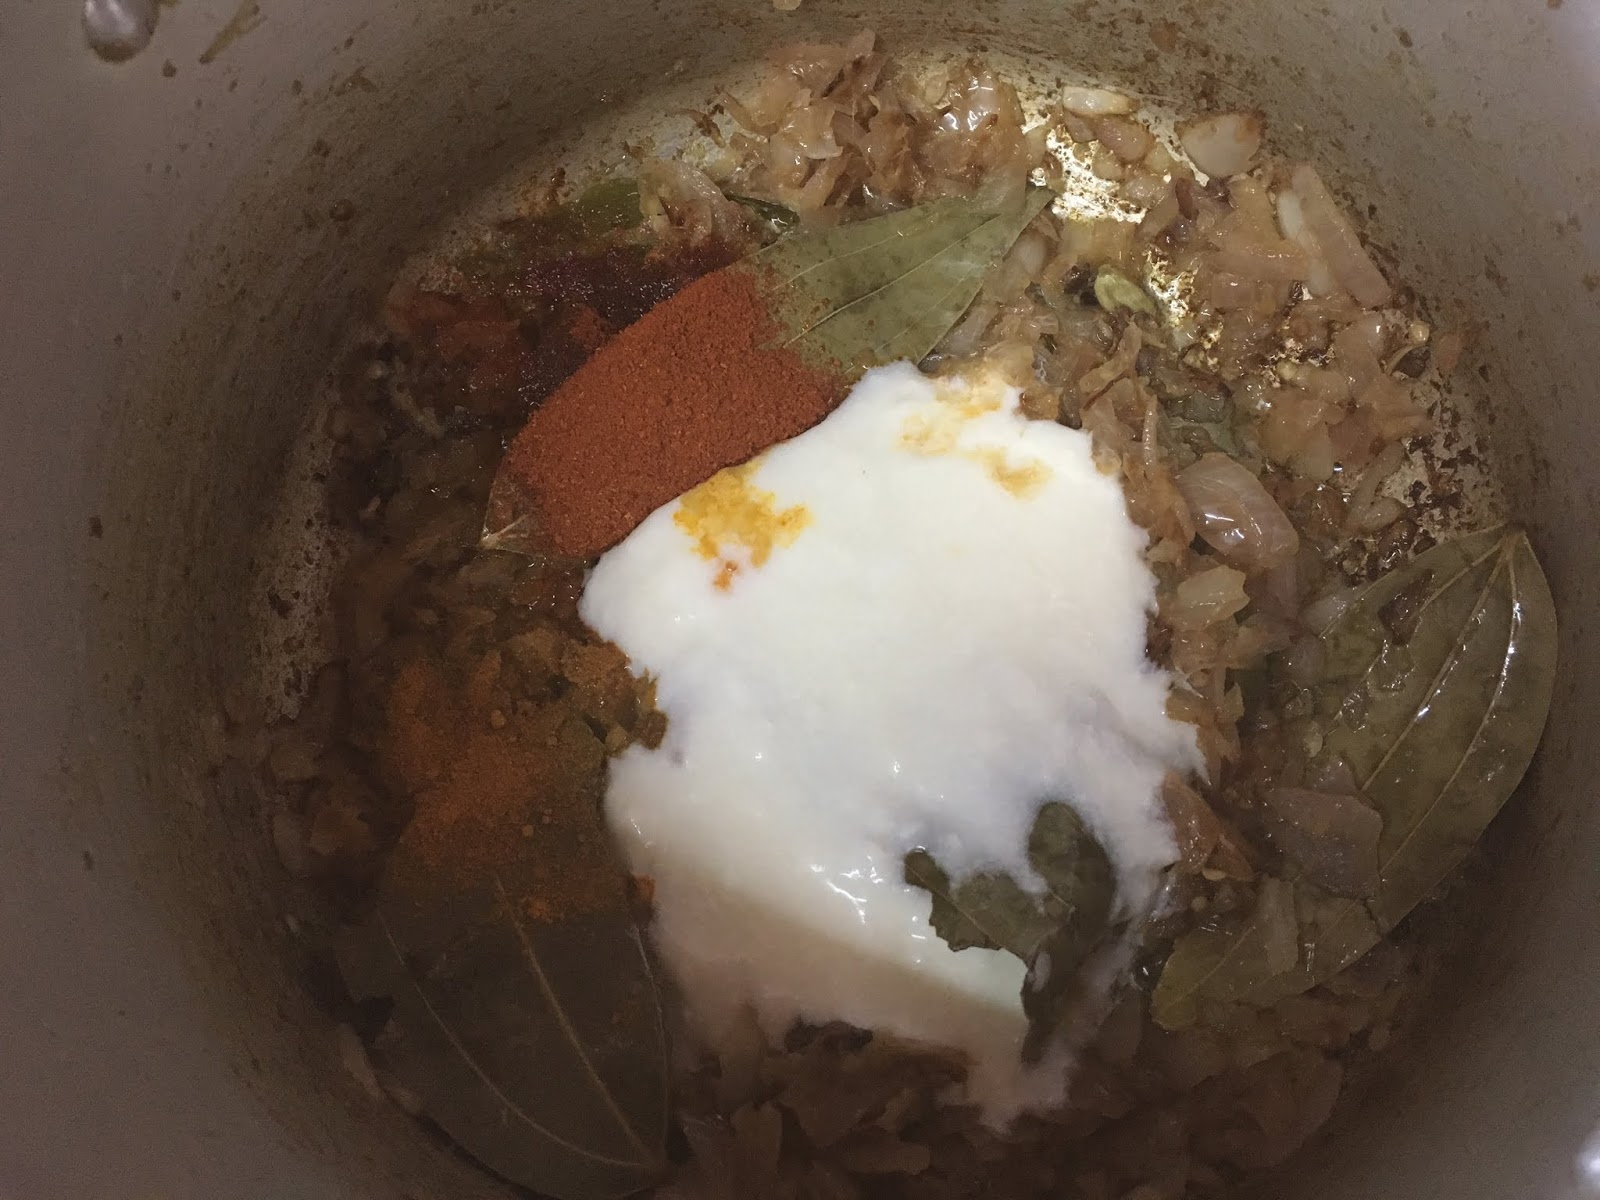
add chili powder and turmeric powder
fry well
add curd and give it a stir
boil it for a minute

add the mutton pieces
stir well so that the masala
coats well on mutton

add tomato and salt
]give it a stir

add 1 cup water.
close the lid and pressure cook
for 7 to 8 whistles

after pressure releases remove
excess stock from the mutton masala
and keep it aside for further use

add the rice.

give a gentle stir so that masala
coats well on rice.
take care not to break the rice

add approprite water as mentioned
in method section. don't forget to include
the excess stock removed from mutton masala
to the water quantity. Add mint and coriander leaves.

close the lid and when the steam
starts coming out,put on the weight
and immediately turn to low flame
cook in low flame for exactly ten minutes.
switch off flame. after the pressure releases
open the lid and leave it for 5 minutes
later fluff it with a fork without breaking the rice.
Serve it like this 👇

Comments
Post a Comment
What are your thoughts? Suggestions or feedbacks? Let me know in the comment section !